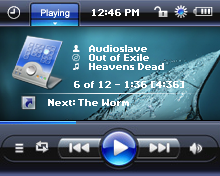
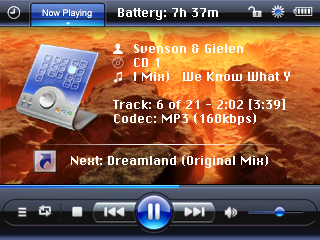
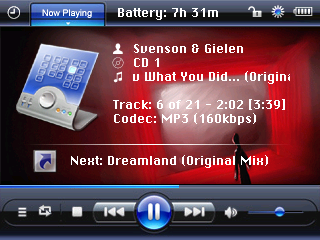
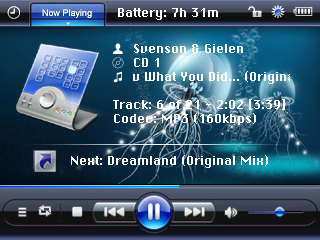
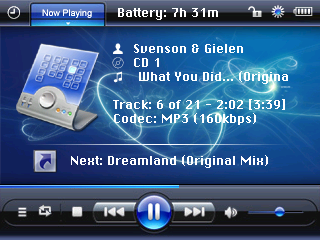
At least :) a lot of people asked me to add Album Art support to my themes, so I did :) (cover image sizes: iPod video = 100x100, iPod Photo = 50x50) this is the result:
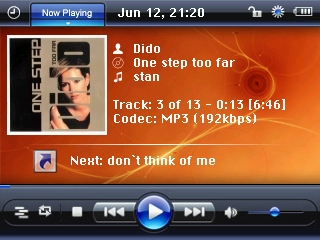
Please note the album art support has been added to the jBlackGlass ipodphoto too.
I fixed the OnScreen keyboard bug too, so now that should be displayed in the right place, and you can download a prebuild binary with the 64MB cache support for the iPod5g 60gb too.
Download Green5g, jBlackGlass and jBlackGlass iPod Photo from here, but please don't forget that you'll need my latest rockbox prebuild binnary! (look for rockbox-jbuild-YYYYMMDD-$yourdevice$.tar.gz)
Note for Prebuild binaries: IMPORTANT: you will need the latest rockbox daily build and after installing that on you iPod overwrite the files with the ones from my build.
If you wish to make your own build, you can find all the patches here.
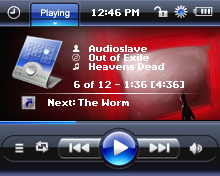
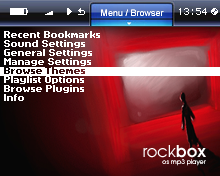
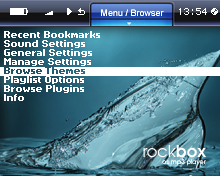
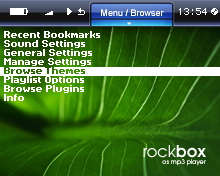
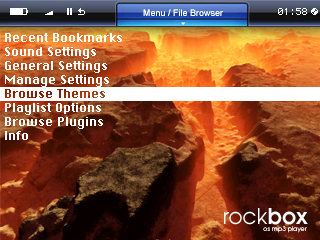
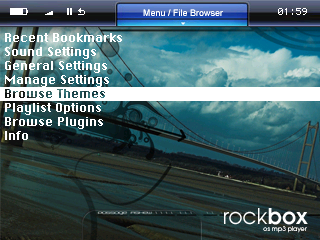
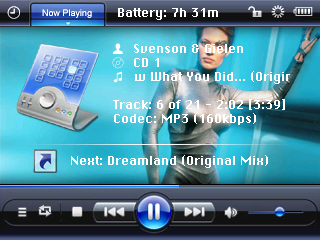
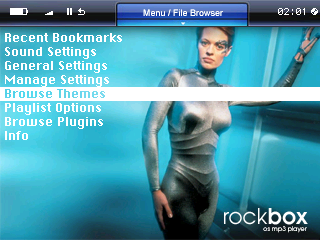
jBlackGlass for iPod Photo/Color
Seth Jenkins kindly asked me to port the jBlackGlass iPod Video theme to the iPod photo, so I did :) but before I take all the credits :) I should say that I couldn't do it without his help, hi helped me a lot with testing and so on, so I would like to thank him for all his help and time with this! Thanks again Seth!
So here you go:


Downloads
* Download the whole package including all themes: jBlackGlass-$yourdevice$-YYYYMMDD.tar.gz
* Patches: Get the latest patches from here
* Rockbox prebuild binaries (with all the patches applied): rockbox-jbuild-YYYYMMDD-$yourdevice$.tar.gz (IMPORTANT: you will need the latest rockbox daily build and after installing that on you iPod overwrite the files with the ones from my build)
* Download PSD files from here
Copyright: I think I stay with the same note that I wrote at the video version of this theme.
NOTE: A lot of people asked me for the font (nedore-9.fnt) which is used by the theme, and because the fonts are provided by rockbox I didn't pack them into my themes, so VERY IMPORTANT download the latest font package from the rockbox server and you should have the right fonts.
Enjoy your iPod :)
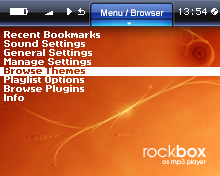
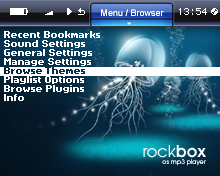
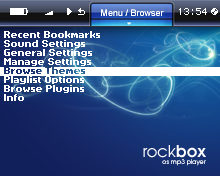
Custom Rockbox boot logo for iPod Color&Video
I just found a great logo for rockbox which was done by S3TUP so, big Thanks to him! and I thought it would be great if we used this one when rockbox boots, so I did a little patch and everything works like a charm.
This is the image which will be shown when rockbox boots:
Get the two images for your iPod color and/or video here:
iPod Color: rockboxlogo.220x68x16.bmp
iPod Video: rockboxlogo.320x98x16.bmp
and get the Patch from here: full_screen_logo.patch which is required for placing the image at the top edge of the screen, and to remove the version label from the bottom, so only the background is shown.
You can always use my prebuild binaries (look for rockbox-jbuild-YYYYMMDD.tar.gz) for both iPod types, but please note that these binaries have been patched with the Scroll margins, Custom status bar height, Custom font height and so on, so your old themes my not look as good as before because this patches have been optimized for my themes :)
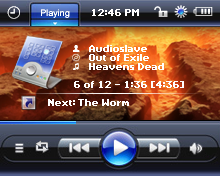
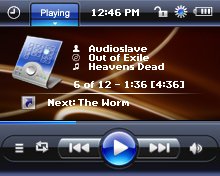
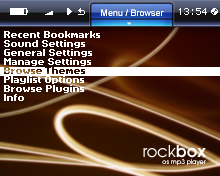
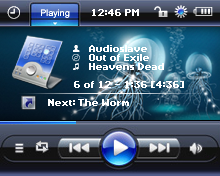
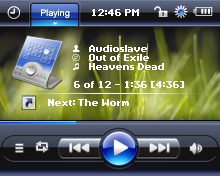
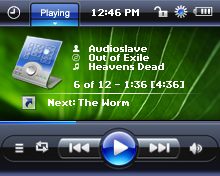
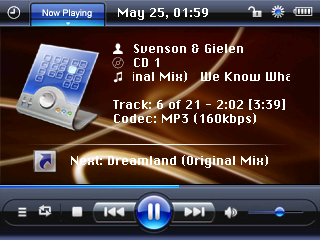
jBlackGlass Rockbox Themes - iPod Video
I've just finished making some new rockbox themes, using Win Media Player 11 design elements, I know, there is already one which is pretty good, but I had something else in my mind, so here is the result:
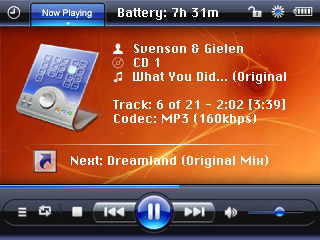

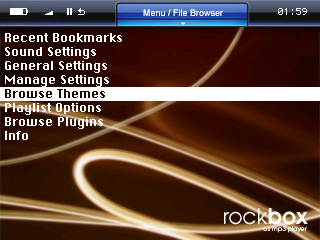

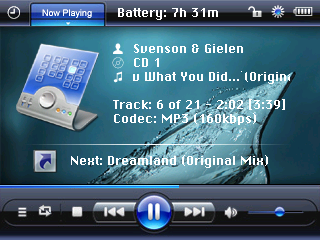
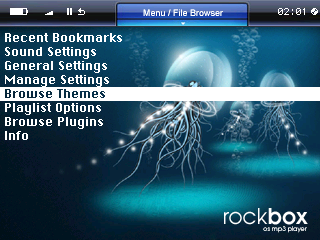


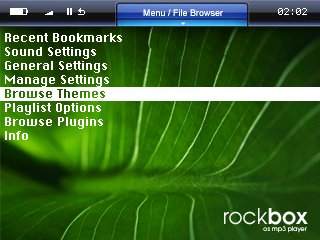
As you can see there are 11 themes in this package, I used a few of my preferred background images, but feel free to use your one, you can get the psd file from here, just add your background image and save the result to your theme directory. See here for more details about creating rockbox themes.
Downloads
* Download the whole package including all themes: jBlackGlass-$yourdevice$-YYYYMMDD.tar.gz
* Patches: Get the latest patches from here
* Rockbox prebuild binaries (with all the patches applied): rockbox-jbuild-YYYYMMDD-$yourdevice$.tar.gz (IMPORTANT: you will need the latest rockbox daily build and after installing that on you iPod overwrite the files with the ones from my build)
* Download PSD files from here
Copyright: hmmm, good subject :). I think WMP11 is done by Microsoft :) and the background were created by different people, but I don't really know which one was made by who, so please don't be mad at me if you don't see your name here, just send me a letter and I will put it up, but I would like to thank you in advance for this great wallpapers and I hope you don't mind seeing them here.
Note: Stev just pointed out that the "jellyfish" background was made by the Digital Blasphemy art team, so I would like to thank them! and some of the other backgrounds are from DeviantArt, so thanks to them and to the authors too!
NOTE2: A lot of people asked me for the font (nimbus-14.fnt) which is used by the theme, and because the fonts are provided by rockbox I didn't pack them into my themes, so VERY IMPORTANT download the latest font package from the rockbox server and you should have the right fonts.
Ok, thats all, enjoy as I do :)
jVim.vim
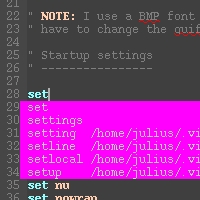
It was time, really :) Ok ok, so when I first read about vim 7 I thought this is it, this is exactly what I was waiting for. Till now I used Anjuta for coding, so I had to modify some of the vim default settings so I have a little compatibility between this two editors.
So what did I do? the first thing that I used a lot in Anjuta was the Shift+Arrows to select some texts, I know there is a good one in vim to by using "v", "y", "p" and so on, but in insert mode I need to be able to select a part of the text and with a backspace or del cut it out, you know when you have to delete more lines it is hard to delete them one by one.
Ok, I think it would be better if I wrote a list so here it is:
1: Shift+Arrows to select text in insert mode
2: CTRL+C, CTRL+V, CTRL+Y compatibility in insert mode
3: Auto complete mapped to all chars, so when you type a popup menu is shown to select from a word list.
4: Automatic fold method (fold method set to indent), and map Space to open/close folds in normal mode.
5: Enable spell checker by default
6: Map CTRL+Left, CTRL+Right to prev/next buffer in normal mode
7: Map CTRL+N, CTRL+x to new buffer and delete buffer in normal mode
8: Unmap CTRL+Z, I don't really need that
A few screenshots:

That's it, I tried to make things as compatible as possible with vim, so you can use all your standard vim keys.
You can get the plugin code from here: jVim.vim
but don't forget, this is my first attempt to write something like this, so any feedback/addition is more than welcome.
ps: The plugin uses the blackdust color scheme, so you may have to change that, but I'm working on a color scheme too, so maybe next time the plugin will use the color scheme it was made for :)
Rockbox, iTrip and iPod
This would be a little howto to get iTrip with dock connector up and running on a 5g iPod with Rockbox.
There are two main thing that are needed by the iTrip to work:
1: The first thing is the power supply on the dock connector
2: The second thing is the apple protocol which allows sending commands trough the dock connector to the iTrip.
To fix the first thing I went to the Rockbox's IRC channel, and to tell you the truth I was amassed about the help I got there, the rockbox team is really co-operative, I must thank especially to linuxstb, he helped me a lot with directing me to the right places, so after testing some of the codes from the iPodLinux project, we found out which one turns the power supply on, and now its already in the cvs tree.
So the first thing seems to be done, now we have power supply on the dock connector, so some of the iPod accessories may already work.
The second thing is a bit tricky, for the moment we don't really have a working apple protocol on 4 and 5g iPods, so there is no way to send commands to the iTrip which are required to turn the iTrip on because even if you have power on you dock connector, the iTrip won't power up till it receives the play command.
But don't worry, there is a solution for this :) it's not the best one, but it works. So what I did was to get the iTrip apart and found out which pins are used for the power supply. See here for the dock connector numbering.
The ones used for power are:
Pin 1 - Ground
Pin 17 + 3V
So if you take two little wires and meld them to this pins on the iTrip then you will be able to attach a second power supply to it which don't needs to be always on, just for a few seconds.
So if you done this, dock the iTrip to your iPod, fire up the original firmware and press play, this will turn the iTrip on, now connect you second power supply to the iTrip and restart your iPod by holding the Select+Menu buttons pressed. You will notice that even when your iPod is of the iTrip is still on, so you can now boot into Rockbox and disconnect the second power supply because we have power with Rockbox too.
So that's it, now you just select your preferred music and listen them on the radio :)
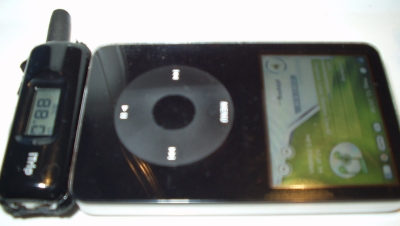
I attached two little flat batteries to the back of the iTrip with a little button, so I just press that small button when I reboot into Rockbox and everything works fine.
Enjoy, I hope it will be helpful to you or someone :)
Gnome-Panel Clock-Applet with Markup text label
When Novell introduced the new XGL (if I know it right, it was David who did all the hard work on this one) I was amassed by the new look of their upcoming distro, and there was a little thing that I noticed on the gnome panel bar, which was the clock displaying the time and date in custom format, so I decided to make mine the same way :)
So here it is:
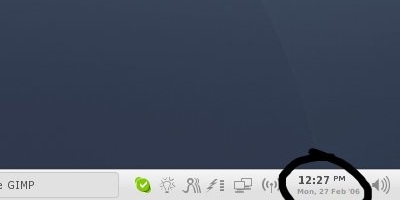
I already submitted the patch to the gnome devel list, and maybe it will get into the next major release, but till then you can download the patch here, and to customize your clock edit the gconf key at /apps/panel/applets/clockapplet/prefs/custom_format
For e.g. this is the code for my clock:
<span font_desc="Sans 10" weight="bold">%I:%M <span font_desc="Sans 8" weight="heavy" rise="4000">%p</span><span rise="3000"> </span>%n<span font_desc="Sans 8" foreground="#999999" weight="heavy" ><sup>%a, %d %b '%g</sup></span></span>
To get this to work, you only need to download the latest gnome panel source from here apply the patch and compile it, and that's it.
Enjoy as usually :)
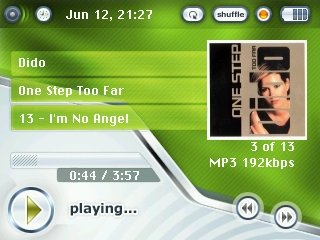
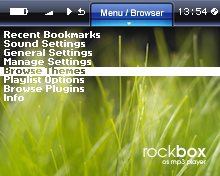
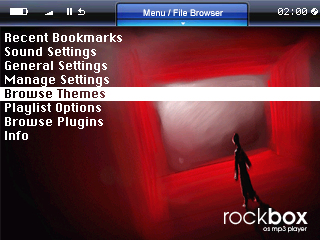
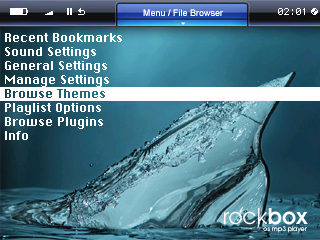
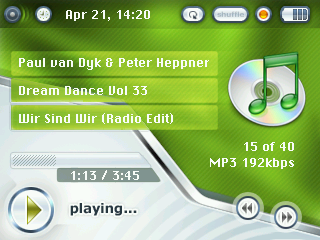
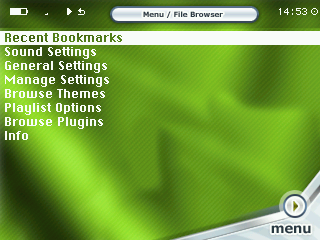
Green5g Rockbox theme
You know what RockBox is don't you? it's the greatest open source firmware available on the net :) yep yep, it just works as it should, and the most important it has a file browser integrated, so its a lot easier to keep your music the way it should be.
So when I first got my iPod 5g (60Gb) to tell you the truth I was surprised how limited the Apple's firmware was, and because I always like to be able to change the things that I use, I installed rockbox on my ipod as soon as possible. There are a lot of themes available for the 5g, but I found a great one on a forum so I decided to port this theme to 5g.
And here it is:
To make everything fit together I had to change some of the rockbox codes, but you can download all the patches below. So these would be the things that you need:
Downloads
* Download Green5g Theme: Green5g-YYYYMMDD.tar.gz
* Patches: Get the latest patches from here
* Rockbox prebuild binaries (with all the patches applied): rockbox-jbuild-YYYYMMDD-$yourdevice$.tar.gz (IMPORTANT: you will need the latest rockbox daily build and after installing that on you iPod overwrite the files with the ones from my build)
* Download PSD files from here
NOTES:
This theme is a port of the "another .wps wannabe!" theme, I'm not sure who did this theme, but here is the link where I found it: http://www.misticriver.net/showthread.php?t=38075 so most of the credits go to GTS-R and I would specially thank him for including the .pds file in the zipped theme it made my work a lot easier!
I hope you will enjoy it as I do, all patches work with today's rockbox cvs (20060617), I will try to keep them updated but for I have a lot of other works there may be problems, so don't hesitate to contact me if you need any help. ps: if I forgot something for e.g. give credits to someone please contact me.
A Note from Matt:
"I was confused on how to properly install, all you have to do is download the theme itself and the modified prebuild binary. The patches are posted strictly for those interested in modifiying them. You can find a .tar opener for Windows called Stuffit. Works well though it's only a trial. -Matt"
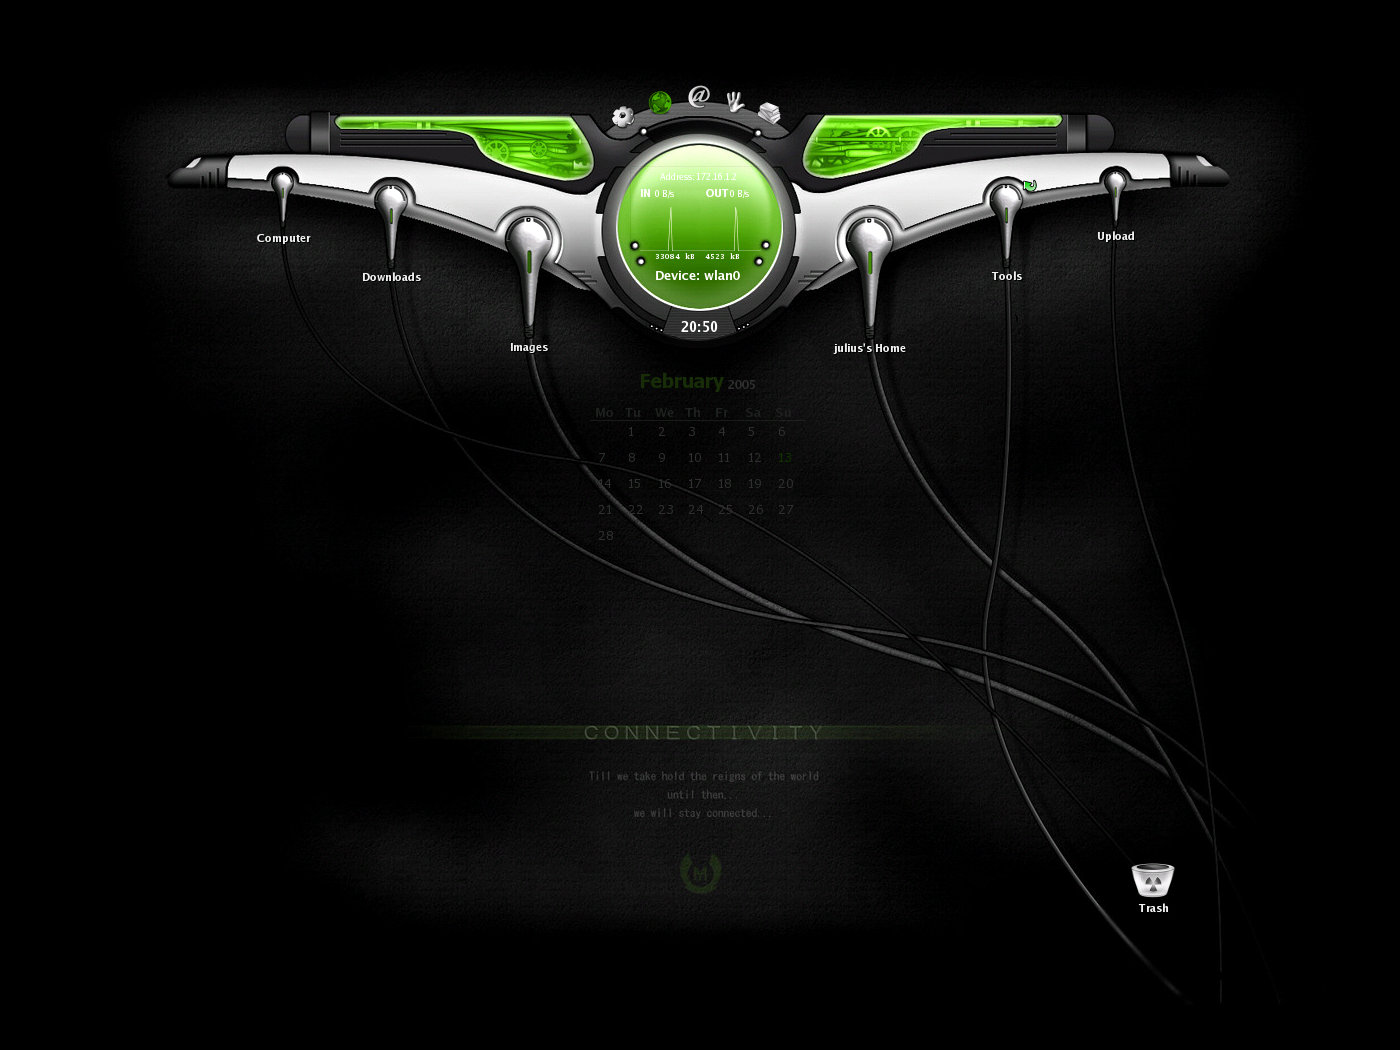
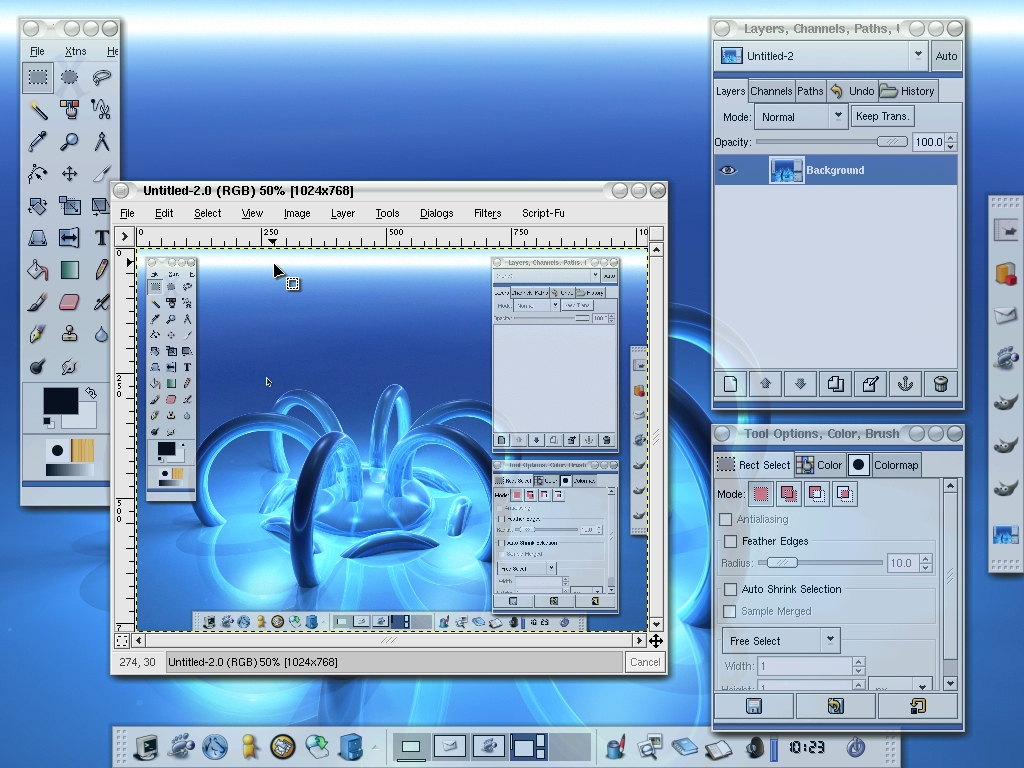
Current Desktop
This is what I see all day long, and the days are just passing by without any warning :)

Details
I use Fedora and the new XGL which leaves Mac OS X behind with miles, to install XGL just follow the steps described on the link above, and you can get more info here.
The original background is here (deviantart.com is down for the moment, so I can't give you a direct link, but search for helv and you will find it) and the flipped one I did is here. Big thanks to Dajno for the wallpaper!
You can get the icons from here, its a mix of the original OSX icons and the nuoveXT, so big thanks to Kiddo & Saki!
Note to icons: there is a directory called OSX/private/applications/usr which should be copied to the root / and overwrite everything if prompted. This is because some of the progrs don't support themeable icons.
The theme is a slightly modified Clearlooks-graphite theme by Lokheed's, which you can get it from here
That's all, enjoy :)
My old Desktops
Here are a few screenshots from my old desktop, you know just to rembmeber them :)
Connectivity integrated to Linux. Used programs: XFce4, Nautilus, GDesklets. Background by: Homeryulo
MacOSX like Linux desktop with shadow effects around the windows, NICE :)
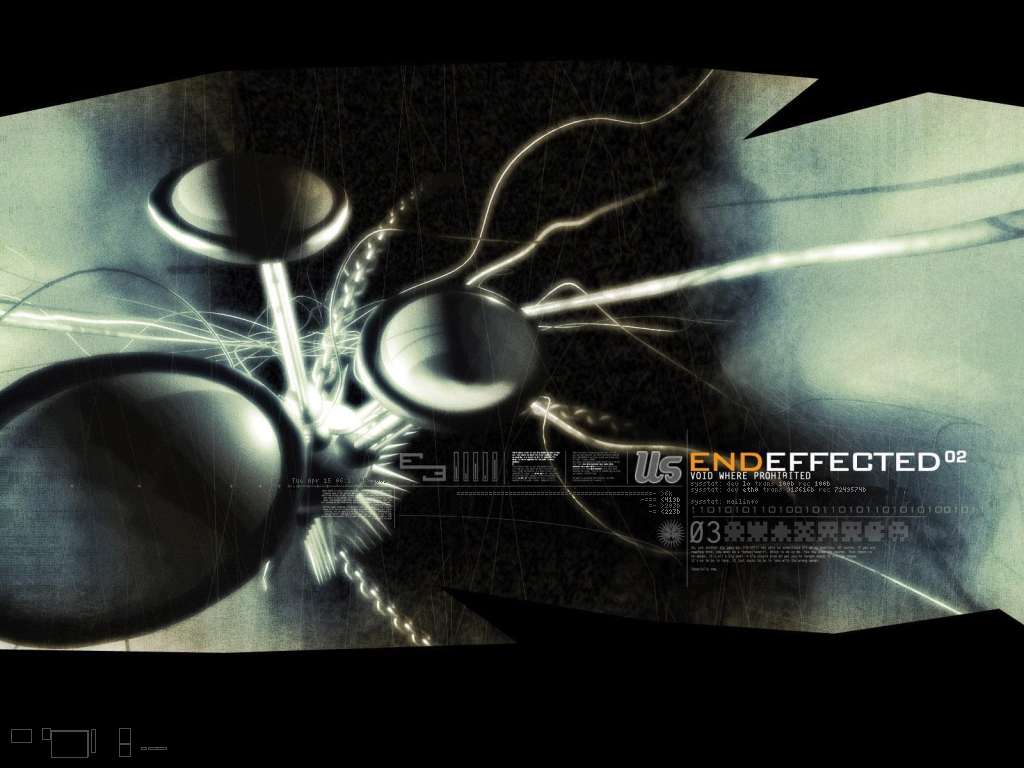
Simply modified EndEffect background with effect to display net traffic and system status.

"A Dream In Yellow" background made to look like a real live background.
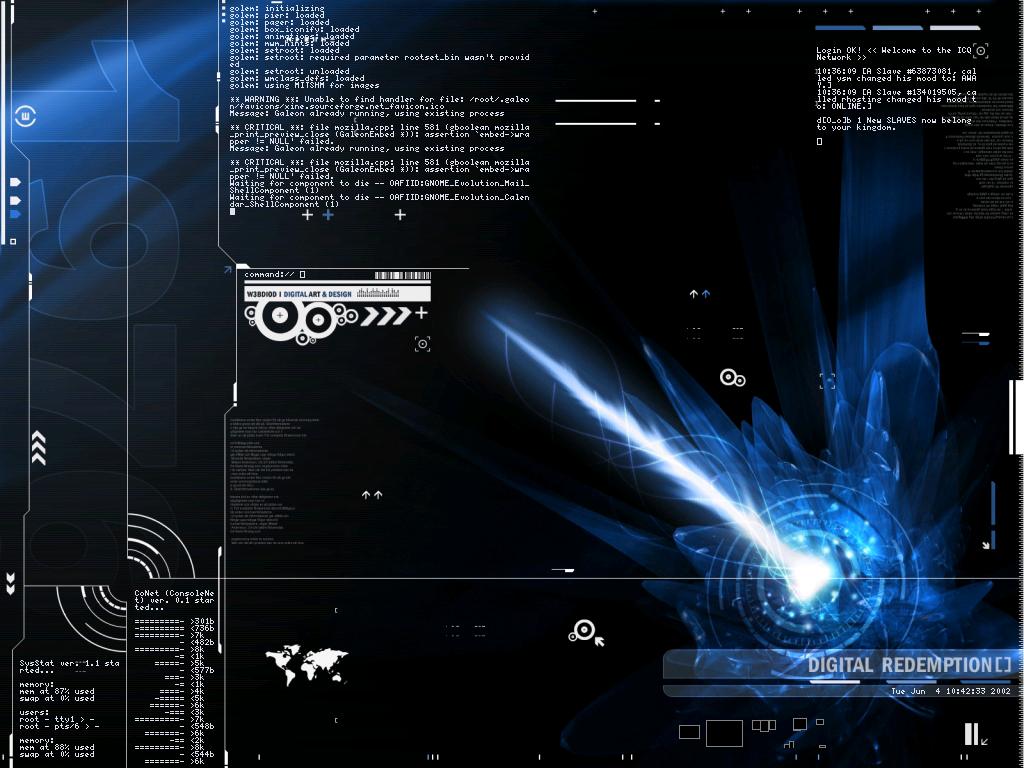
DigitalRedemption background used with console programs like CoNet, SysStat.

The BludStream background and many infos on screen, like console log, console icq ...